Styling your hair changes your appearance. Feeder Braid is a fun way to make your hair look bigger and stronger. Feeder Braid is basically a cornrow braid. You can add an extension to the braid like coloring the hair to add some fun. For styling your hair into a Feeder Braid, you need to start with partitioning your hair into small sections. Then make the braid of each section into a cornrow.
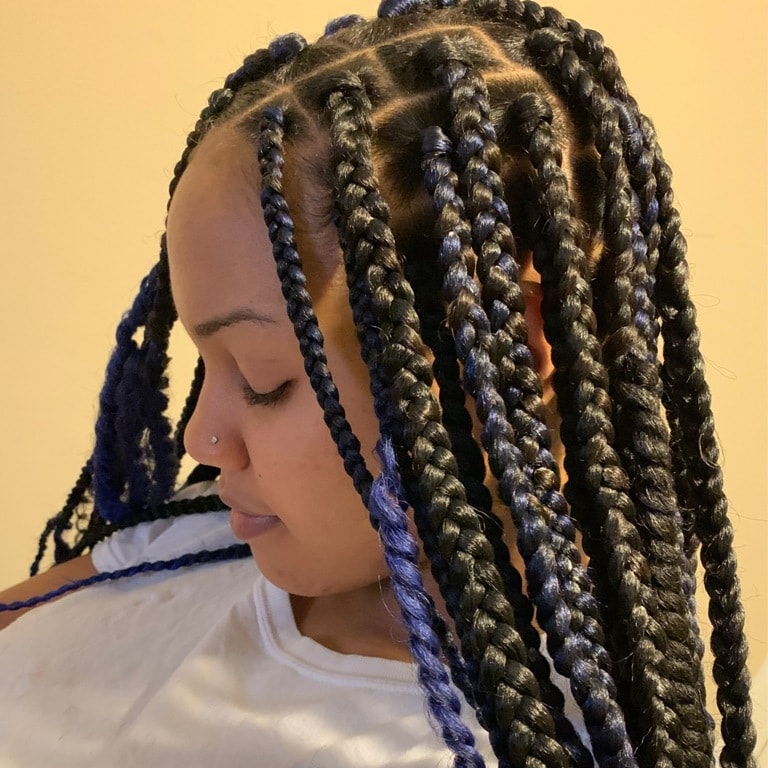
Feeder braids are the illusion of naturally long cornrow braids. It seems like they are naturally growing from the scalp. In this, the hair extension’s are attached to one’s natural hair strand. The feeder braid style is lengthy though it stays for a long period and is in several shapes and sizes of different textures and lengths. They can stay for up to 2 weeks.
It is a traditional hairstyle, also known as cornrows because of their resemblance; they look like cornfields. They were originally worn by indigenous people in Africa from 3000 b.c. to indicate social status, marital status, and tribes. Hair also describes their identity. Cornrow was often used by slaves to give homage to their homeland in Africa. Slaves also use cornrows as a system to escape their captivity. Cornrows were the message running towards their freedom. Later it became a symbol of resistance during the black power movement, and it has now become popular as a protective style for black people with both natural and premed hair.
The Feeder braids are actually cornrows; they got this name because of the feeding-in method. Thick hair is taken to make cornrows. The starter hair is your natural hair; later synthetic braid is added into the natural one to create a long cornrow that looks like a natural cornrow. Because of their long and natural appearance, they are becoming trendy.
For creating a feeder braid hairstyle, one needs to use a good synthetic extension hair and make sure that your hair should be well moisturized and detangled. Feeder Braid is an easy hairstyle when practiced regularly. It only requires a hairbrush or comb and a rat tail comb, which is optional. This article is a step-by-step guide to style a Feeder Braid.
Supply – Things Needed to Make Feeder Braid
Hairbrush or comb Rattail combProcedure To Make Feeder Braid
Step 1: Clean and detangled hair
Before you start with the hairstyle, make sure your hair is clean and silky. If you find your hair oily or you have applied any hair products on your hair, wash them with shampoo and conditioner.
Detangle your hair properly. Start by detangling your hair from tips. Use your daily comb or brush for detangling the hair.
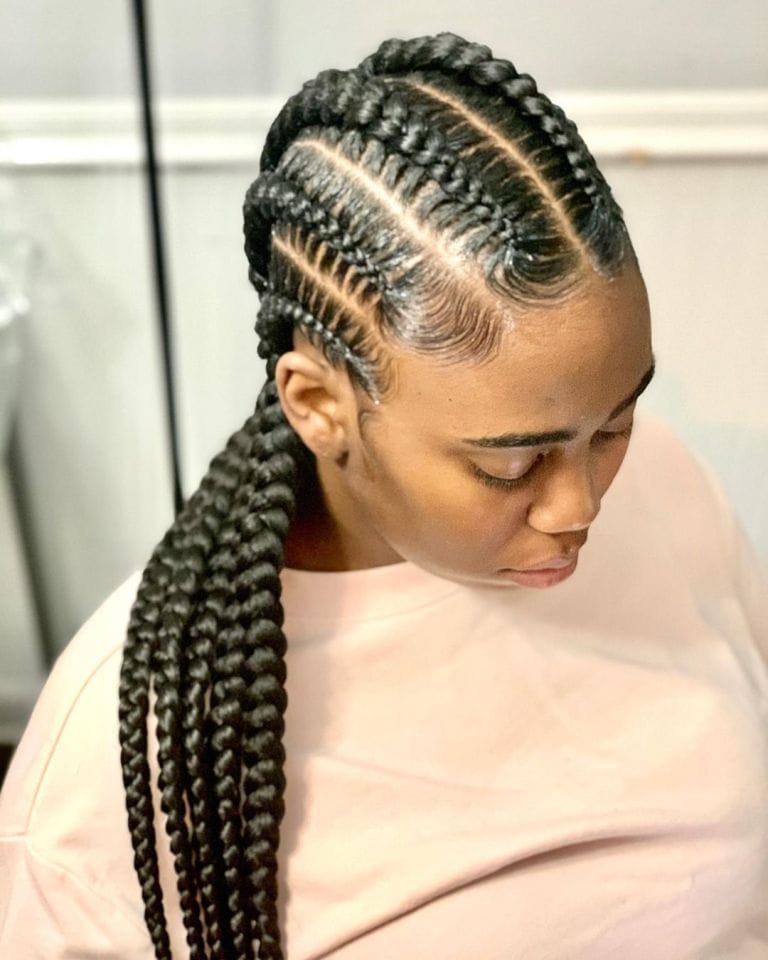
Step 2: Partition your hair into small sections
Start from the front of your hair, run the comb along a straight line to the back. Use a rat tail comb to section your hair. You can make parts as you want. Tie or clip each section before you move forward. You can make any number of hair sections as you wish.
Step 3: Make a braid of each section of hair
Now remove the hair clip or rubber and start braiding each section of hair. Make sure the braid is tight. Make a fine hair braid of hair till the tip. To make a braid, divide each section of hair into 3 parts. Then cross the right part over the middle part. Now cross the left part over the middle part. Continue doing this till you reach the tip of your hair. Once you reach the tip of your hair, secure the hair with a hairband.
Repeat this process for all the sections of your hair. And there you will get a wonderful Feeder Braid hairstyle.
Feeder Braid Versatility
This braiding style is very versatile and comes in all shape, size, length, and color. It’s up to you which one you want to choose. Most people opt to have braids made in an intricate style. There are many different styles you can go through and carry with feeder braiding styles like feeder braiding ponytail, buns, half up half down, and side swooped looks. The feeder braids ponytail is very popular and trendy, which is easy to wear and maintain. The feeder braid is lengthy though it is long-lasting. The feeder braids updo is very popular; most young women love to do this hairstyle.
Feeder braids are the base style, and there are many other traditional braiding styles, such as Ghana braids, stitch braids, and goddess braids. Feeder braid is a very great and protective style. It is time taking but long-lasting; it can last long for 2 weeks or even more. Maybe a better base for the extension hair to grip on. The feeder braids are very helpful in reducing stress and tension. But you should make sure that your braids should not be much tight because it can cause breakage and soreness to the hair. If your scalp is sensitive, then the installation process could be unpleasant. For achieving the neatness in feeder braids, you may experience some tension.
The installation process takes 1 to 3 hours to complete. It depends on the type of feed you do. Feeder braid is a very favorable option since it is a protective hairstyle – the braids help protect your natural hair. In the state of low manipulation, your hair has time to flourish and grow without the normal breakage. It is a long-term styling process; therefore, you can switch to this style whenever you want. Poor installation can also lead to extra tension on your hair follicles and can cause breakage to your hair. Therefore if you suffer from a sensitive scalp, then try to avoid this hairstyle.
How long can I keep the Feeder braid?Not more than 4-6 weeks. You can cover hair with a silk or satin scarf at night. This will last the braid longer. Also, massaging your scalp with a leave-in conditioner will make them feel fresh.
Can I wash my Feeder Braid?Yes, you can wash them. Wash your braid once every two weeks. You can use dry shampoo for cleaning your hair.
Does the Feeder Braid help hair grow faster?Yes. Feeder Braid gives a specific structure so that hair grows faster. This braid can protect your hair from breakage and help them grow faster.