Based upon the number of views, we can tell you’ve all loved our Rope Twisted Bun from a few months back! As lovely as that hairstyle is, it can take awhile to create.
So, this week, Kamri and I thought it would be fun to show you another of our adorable textured bun hairstyles, that uses some of the same techniques, only much faster to complete!
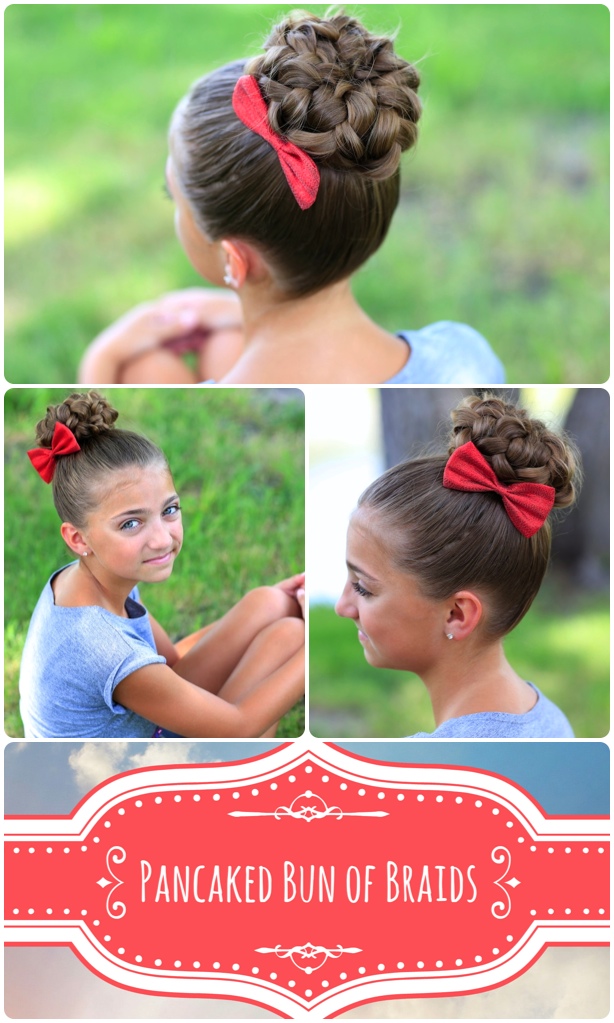
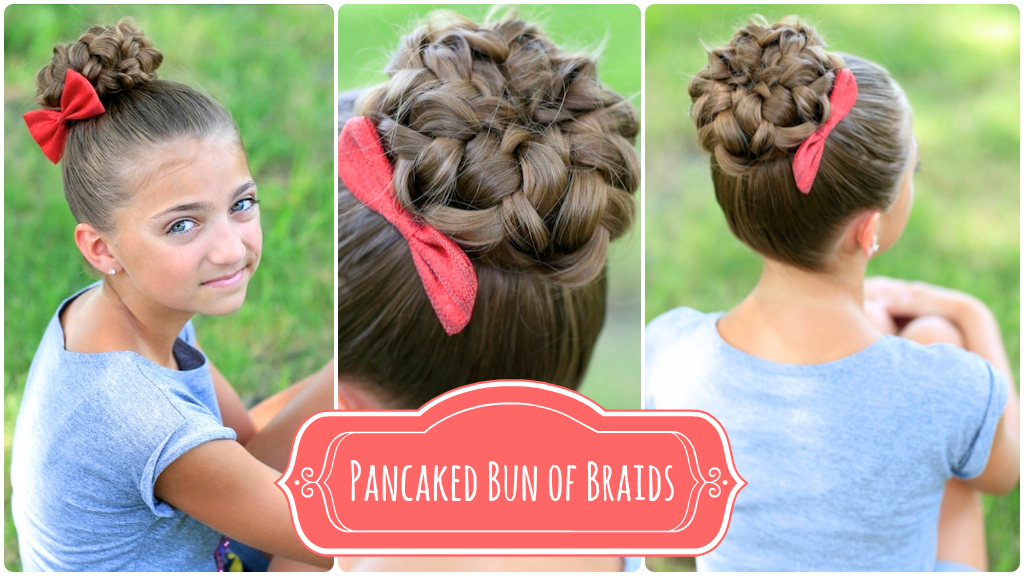
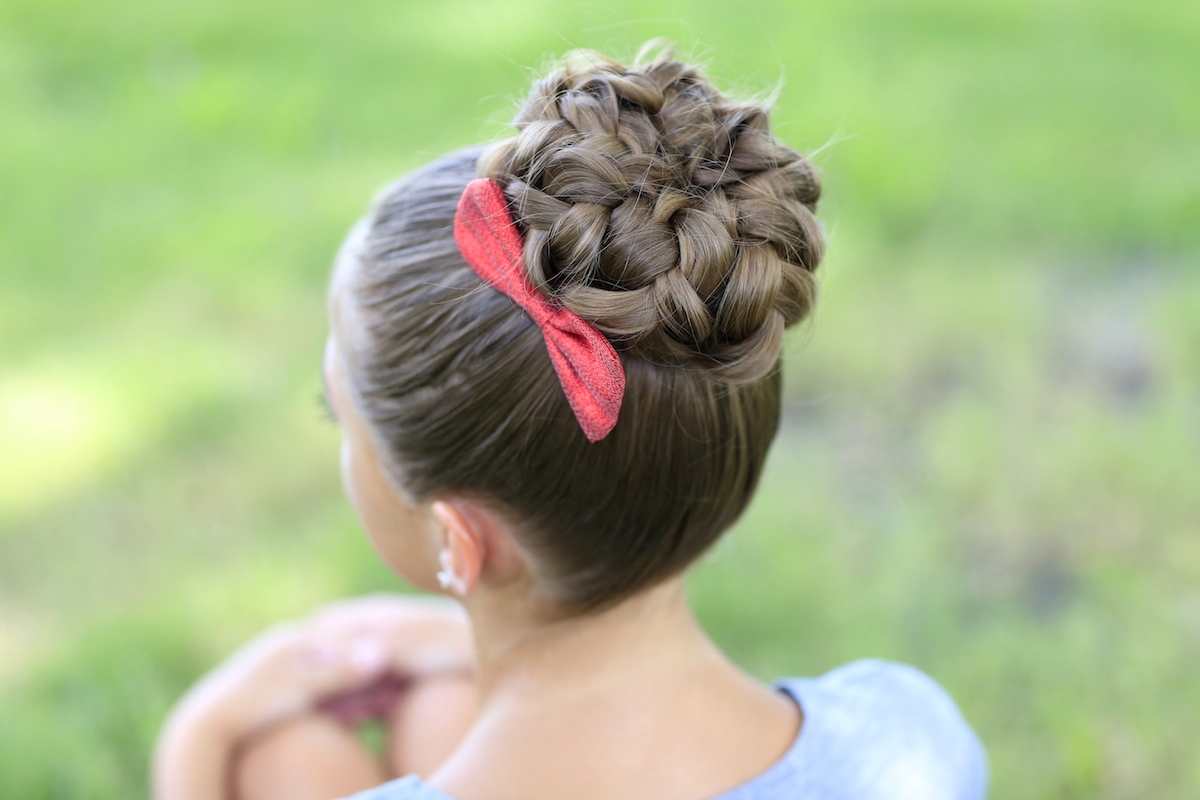
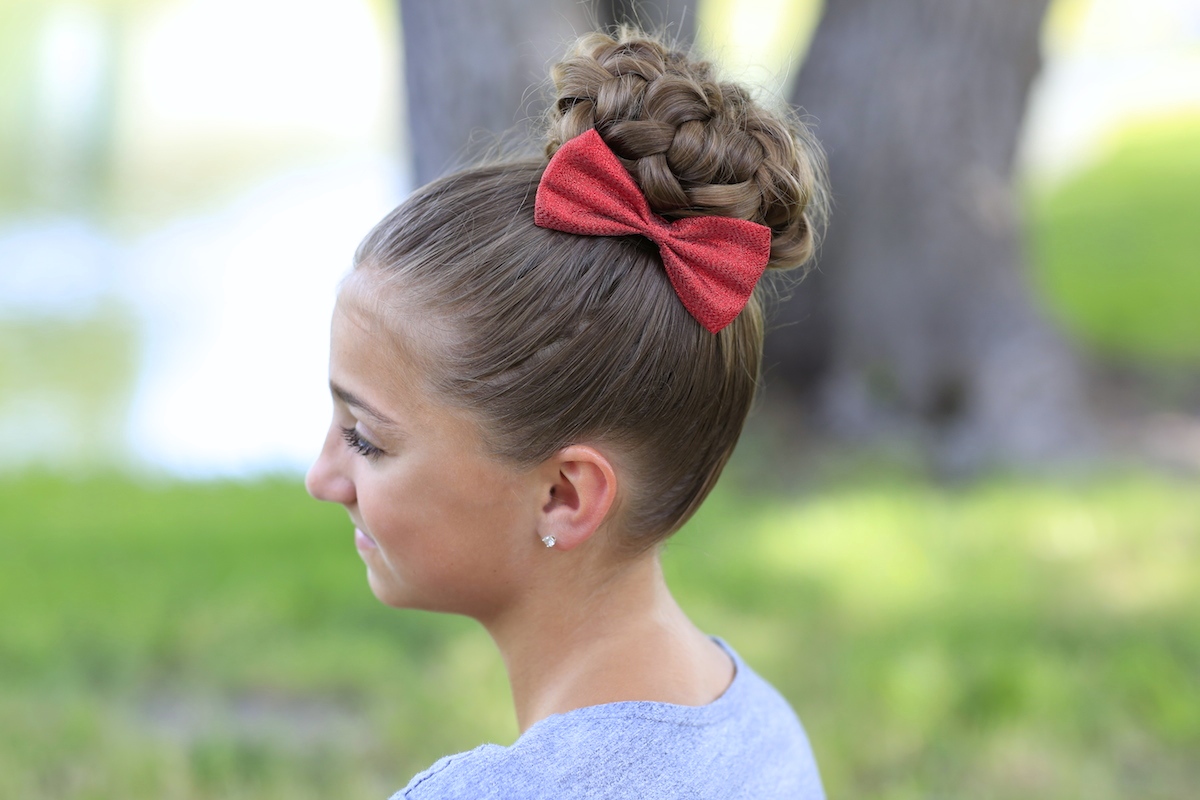
This style is called the Pancaked Bun of Braids! The updo uses a bun maker/donut over a ponytail, and is exactly what the name states… a bun full of pancaked braids! {If you do not have a bun maker, you can make one simply by cutting the toe off of a long sock, and then rolling up the sock.}
There are a few tricks to getting this bun just right, and in this tutorial {particularly the video} I will show you several tips on how to do this.


To see your recreation featured in our CGH App, feel free to tag your own photos of this hairstyle on Instagram with: #CGHBunOfBraids
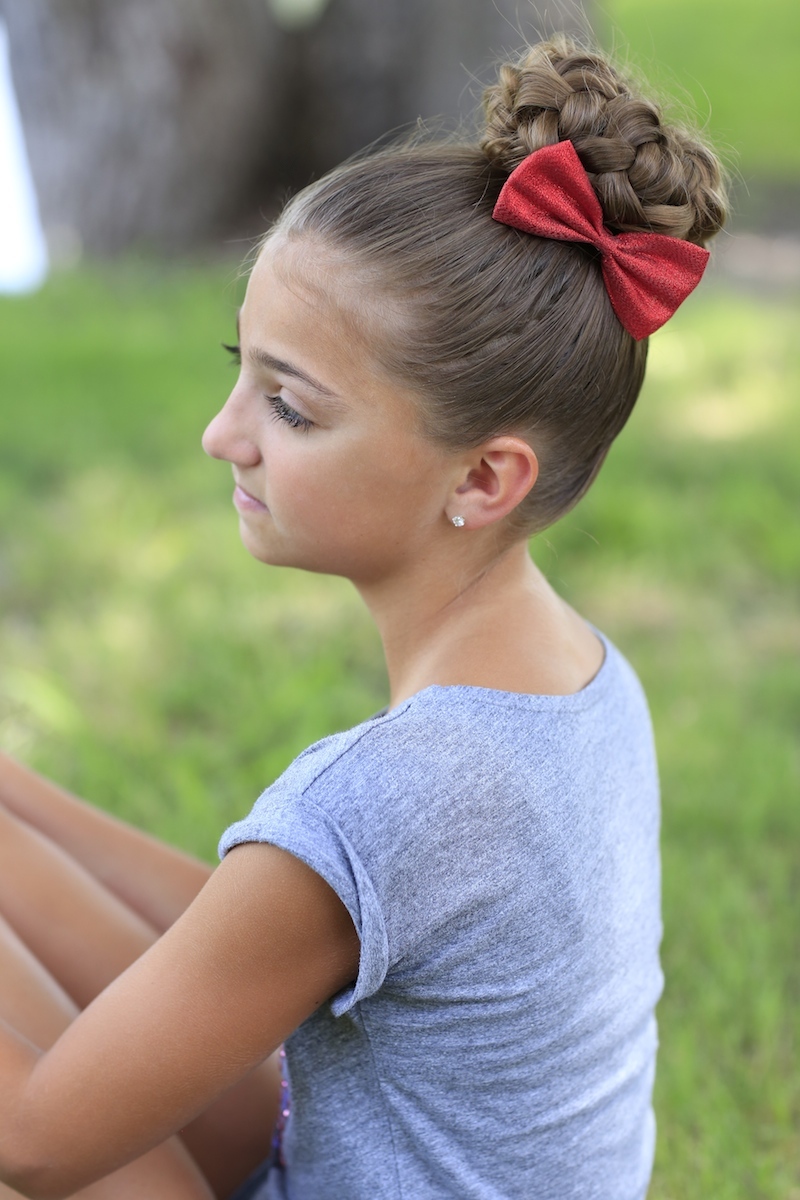
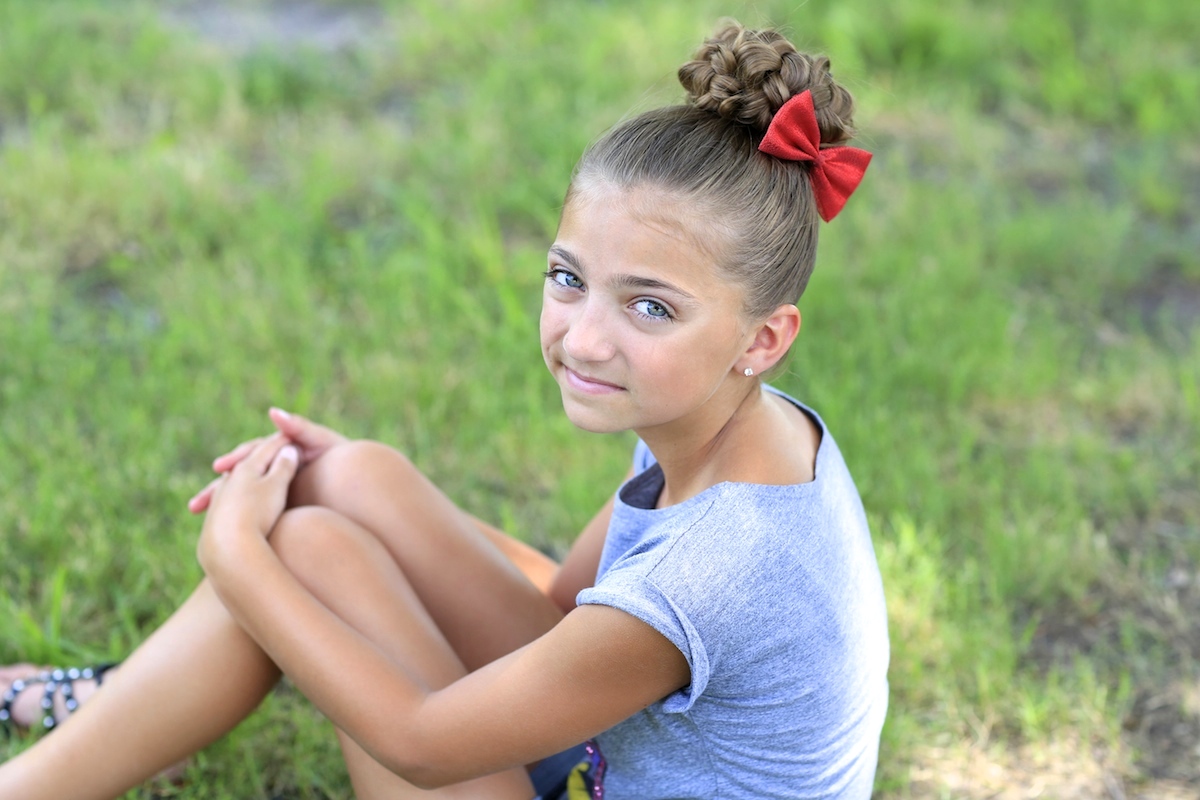
This hairstyle would be perfect for dance, gymnastics, ballet, cheer, weddings, Prom, Homecoming, or for every day wear! You can dress it up by wearing something formal, or dress it down with a cute t-shirt and jeans.
The best thing about this beautiful bun, is that it can last you for two days!
Enjoy!
Items Needed: Brush, rat-tail comb, spray bottle, bun maker, 1 small hair elastic, 6-8 hair pins, hairspray and accessory {if desired}.
Time Requirement: 10-12 minutes
Skill Level: Medium
Step-by-Step Instructions:
Begin with your hair in a high ponytail… Put the ponytail of hair through the middle of a bun maker, and let the hair natural separate and fall until it covers the entire bun maker… Now create a little separation in one spot on the bun maker {this is where you will begin your first braid}… Gather about one inch of hair, and begin a simple braid {the braid needs to be somewhat loose, don’t pull it too tight as you braid}… Braid down this length of hair about 6-8 inches, enough to wrap around the bun maker once, and that’s it… Now, stick your fingers down through the middle of the bun maker, and underneath it, grabbing the end of the braid and pulling it through {this wraps the braid once around the bun maker}… Next, taking that same braid, separate any still braided hair so that all the hair in the strand is loose again… Add in about ½ inch of new hair to your first strand, making sure to mix the hair thoroughly by running your fingers through it {ensuring that the short strand is now evenly mixed with the longer new strand}… Now, divide your newly-created section of hair into three even strands and begin a regular a new three strand braid {again, only braid down about 6-8 inches}… Reach your fingers down through the bun maker, and underneath it, and pull through this braid, making another braid wrap around the bun. Next, take a hair pin, and pin together the very outside edges of the two braids, on the underside of the bun {helping to cover the bun maker}… Now loosen any left over braiding to the strand, and add in a new 1/2 inch section of hair once again… Complete Steps #8-12 until you have used up all remaining hair… One your last braid, continue with a simple braid all the way down the strand, and secure with an elastic… Wrap this braid around the bun maker as many times as you can, keeping in mind that it needs to be loose enough to pancake it {the number of wraps depends on your hair length, for Kamri’s I wrapped it twice around and pinned the end inside the bun} … Now go back and pancake the braids by tugging on the elbows of the braids, to create a full textured effect to the bun {you really want the braids to be nice and flat, which will very much help hide the bun maker}… Use hair pins, to help make the bun have a perfect look… Add an accessory and hairspray {as desired}.Please feel free to leave a comment below letting us know what you think updo! To where would you wear this style?
Happy Hairstyling!

We’ve been traveling a lot this summer, and our twins are now in Utah for two weeks without us! {Yes, I miss them terribly!} So, in preparation for the trip, the girls filmed a teen “Airplane Essentials” and uploaded it on Wednesday to their BrooklynAndBailey YouTube channel! Simply click below to see a haul of what they take with them on a plane! Great tips!