*Note from Mindy: Congratulations to Shaunell on being our December Hairdoer of the Month! Shaunell recently started hairblogging and has a lot of talent, not to mention really cute daughters! Please visit Shaunell at Shaunell’s Hair. If you love the hairdo, let her know! Here is her introduction and hairdo: * ~ * ~ * ~ * ~ * ~ *
I am a stay-at-home mom of two angel (I truly believe) girls. They are my life and my loves. I have always loved doing hair… and doing it in fun, cute ways is a highlight to my day. I love to share them, and of course, show them off on my babies!!
Here’s our angle on hair! A super cute sideswept ‘do. This one always gets a TON of compliments! It works great on short or long hair!
 Time Requirement: 15-20 min (if uninterrupted by other children)
Items Needed: 5-6 elastics, spray bottle (or means to wet hair), and comb. A large doodad for the hair is also a bonus. Hairspray is a must!
Skill Level: Medium
Step-by-Step Instructions:
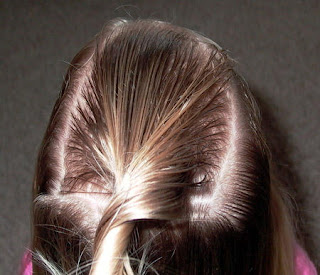
First, part off top of wet hair into a square in center of head, making both sides on a slight angle (naturally!). You’ll be making 4 sections, and this is your first 2…
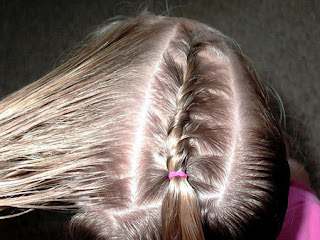
 Next, split this section down the middle into two sections, and clip off one section to prep for first twist braid (as below)…
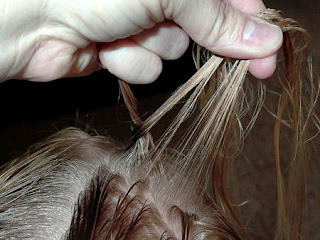
 Take a small section at the front and divide in two…
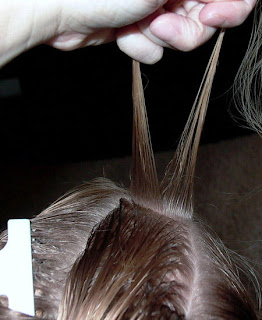 Cross the pieces to begin twist…
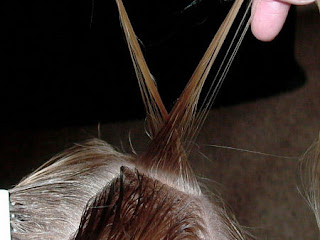 After initial twist, pick up and add hair from one side, just like when French braiding. Then add hair in the same manner to other piece of twist, and twist two sections around each other again…
 Continue in this manner: Add hair to both sides of twist, then twist around once…
 Finish off by twisting tightly without adding more hair, and secure with elastic. Do the same thing in next parted off section.
Prepping for side section. Part down to ear and follow twist pattern as mentioned above…
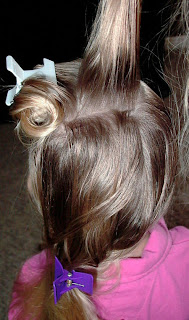
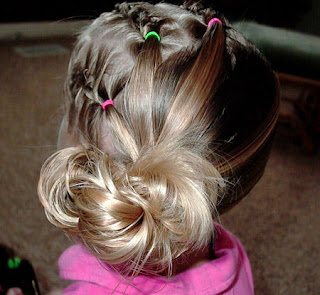
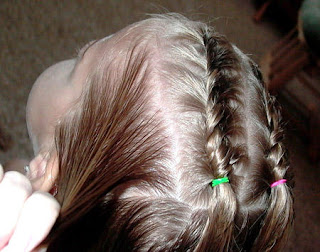 Do teh same with the other side. Now, here is a photo fo teh four finished sections…
 I used varying colors of elastics just to make it fun. See the cute angles? DARLING!
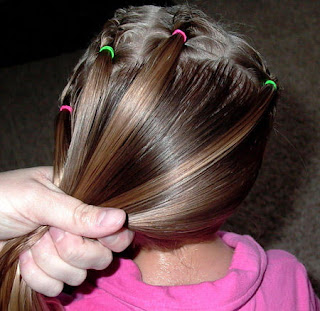
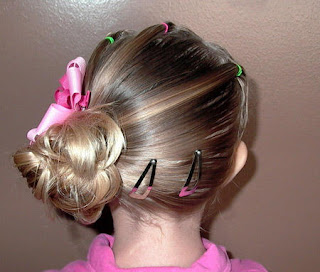
Next comb the rest of the hair, including the 4 ponys, to the side, going at the same ‘angle’…
 If you have shorter hair to work with, then make it into a pony, or a pull-through pony. Here I’ve done what I call a Stuffed Bun. Do a pony, then on last time through, pull through halfway. Take long tail and loop around and ‘stuff’ it back into the elastic. (For tips on how to do this easier, see my blog post Stuffed Bun). Keep stuffing until it looks nice and messy. I don’t like the double loop look, so I just keep stuffing in until I like it. Spray well with some spritz!!
 I also added some snap barrettes, since side ponys can have escapees out the back easily..
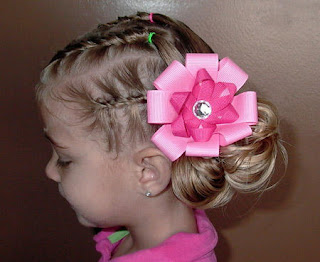
 Stick in a super darling doodad (I got mine from Madibu Bows!) to draw attention to your girl’s “Angle”!
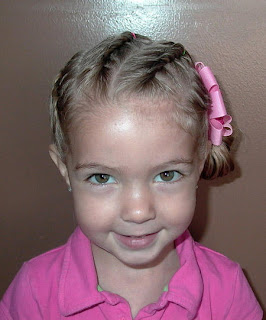
 And show off that super cute smile!! Do you think she has an “angle” underneath that angelic expression?
* ~ * ~ * ~ * ~ * ~ * *Note from Mindy: If any of you would like to enter our Hairdoer of the Month contest each month, please click the link for details!
Happy Hairdoing!
* Note from Mindy: Don’t forget to follow us on BlogLovin, a new easy-to-use blog reader!