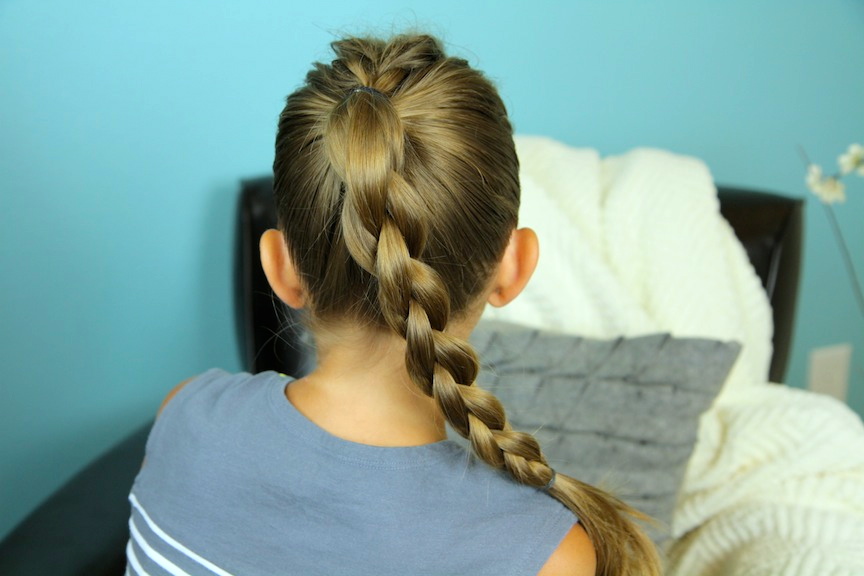
Today we want to show you a beautiful new high ponytail that is now sitting in my Top-5 list of CGH hairstyles!
With back-to-school season already here, it is great to head into the school year with a few super-cute, and quick hairstyles ready to go. This hairstyle is certainly on our list!
This is a very versatile look with the braid going well with just about any outfit, and the style holds well for sports, cheerleading, and dance. You can even choose to wrap the braid into a bun for a very beautiful updo!
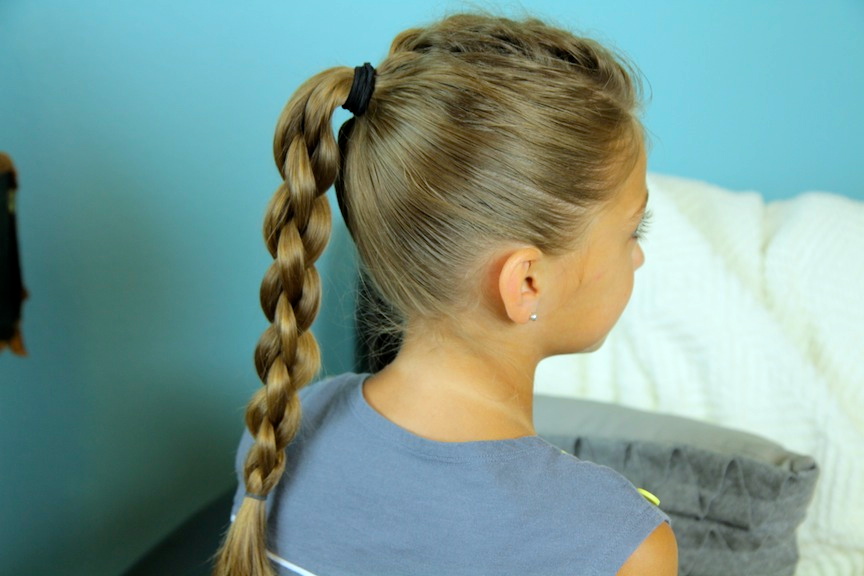
We have shown you before how to create a chain braid, and a Double-Twist Ponytail. This braid has a ver similar look, but we are actually using single Frenchback into a Round {or 3D} Braid.
The braid stranding is a bit confusing, but once you have the hang of it, this can be a 3-minute hairdo! {That is the only reason why this hairstyle is rated “Medium” in skill level.}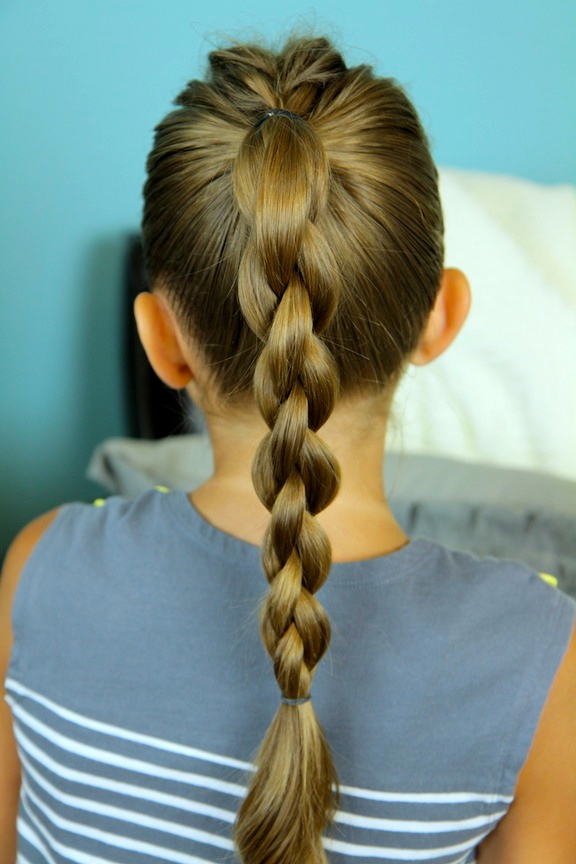

Brooklyn wore this hairstyle during our meet-up a week ago in Downtown Disney, and it definitely was noticed by the fans!
Enjoy!
Items Needed: Brush, rat-tail comb, spray bottle, 1 large hair band, 1 small hair elastic, hairspray {if desired}.
Time Requirement: 3-5 minutes
Skill Level: Medium
Step-by-Step Instructions:
There are many ways to style this braid. Here, I have used a single Frenchback into a high ponytail, but you can use it in any variety of hairstyle combos.
Begin by pulling the hair into a high ponytail, and secure it with a hair band… Now divide hair into 4 equal sections, laying each section between one of your fingers on your right hand…. The hair should lay like this: Strand #1 {outside pinky finger}, Strand #2 {between pinky and ring finger}, Strand #3 {between ring finger and middle finger}, strand #4 {between middle and index finger}… Now, take the index finger on your left hand and use it to hook Strand #3. It should now lay between your pointer finger and your middle finger. Take your middle finger and hook Strand #1. This will now lay between your middle and ring finger… Take the last two pieces and twist them once {so they cross over each other} and place them so Strand #4 lays between your ring finger and pinky and Strand #2 lays outside your pinky… All strands should now be sitting in your left hand and will be numbered 1-4 from left to right… Take your right index finger and hook Strand #2. This will now lay between your index and middle finger… Next, take your middle finger and hook Strand #4. This will now lay between your middle and ring finger… With the last two remaining strands, do a half twist so they cross, and then place them so Strand #1 now lays between your rink finger and pinky, with Strand #3 laying outside your pinky… Repeat Steps #4-10 until you run out of hair… Secure with an elastic and add accessories as desired.Please feel free to leave me a comment below letting us know what you think! As always, if you loved this hairstyle, please feel free to share it!
Happy Hairdoing!

Also, don’t forget my twins’ video this week on their YouTube channel! Both of them wanted to upload a Babysitting 101 video for younger girls looking to start! All of the tips were their own ideas! So cute!