Yes, we are taking a trip back in time to add a feature to a hairstyle that we made near the very beginning of this website. Today we are going to show you how to add a 4th strand to the Waterfall Braid!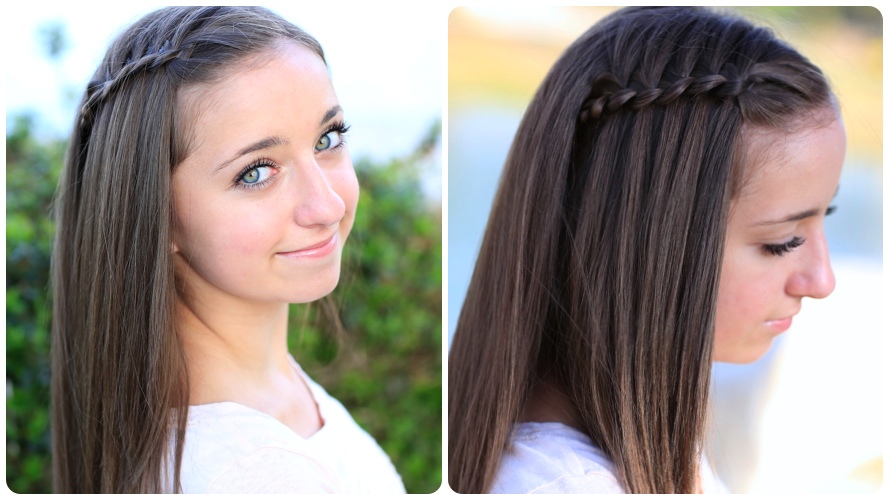 If you know the Dutch Braid stranding or stitching, then this braid will be a cinch for you! Feel free to tag your own photos of this hairstyle with: #CGH4StrandWaterfall
Bailey has loved our Waterfall Braids the most, out of all my girls, and wanted to be our model for today. In fact, it was Bailey’s idea to pancake the braid, which really makes it stand out! If you have longer hair, feel free to continue the braid around the back.
For shorter hair, you may create a braid on both sides of the head, and bring them back into a tieback, or simply what we have done here and have a single accent braid. The 4-Strand Waterfall Braids are beautiful any way to style them!


Bailey has worn this to school and had lots of compliments, and I’ve worn it several times over the past year or so, with the same result!
FYI… this hairstyle would not be recommended for younger girls who are active during PE or recess, unless you bring two braids back into a tieback.
Enjoy!
Items Needed: Brush, rat-tail comb, spray bottle, 2 small bobby pins, hairspray {if desired}.
Time Requirement: 3-5 minutes
Skill Level: Easy
Step-by-Step Instructions:
* Note: The hair you use in the initial stranding will be the hair that runs throughout the entire braid. If your hair is layered, or shorter in the front, it will be difficult to carry this braid all around the head without the layered ends sticking out.
Begin by parting the hair on one side of the head… Next, pick up a good sized section of hair in the front next to the part line,and divide it into 4 equal strands… Take the top-most strand {closest to the part line} and take it under the 2nd strand, over the 3rd strand, and under the 4th strand… Now release that strand and allow it to fall {becoming the first waterfalling strand}… You should now be left with three strands to braid… Then, complete one simple 3-strand Dutch braid stitch by taking the middle strand over the right strand, and then taking the new middle strand over the left strand… Next, pick up a new small strand of hair next to the part line and use this as a new fourth strand of hair… Repeat Steps #3-7, always creating one simple 3-strand Dutch braid stitch in-between dropping through the 4th strand, and adding a new one. Braid until you are comfortable with the look… Now, lift a small section of hair on the side near the back, using crossed bobby pins to secure the end of the braid, and then let that hair fall to cover the bobby pins… To really make the braid POP, gently tug on the elbows of the braid to pancake it. Add hairspray {if desired}.Please feel free to leave me a comment below letting us know what you think of this Pancaked Four-Strand Waterfall Braid! As always, if you loved the tutorial, please feel free to share it!
Happy Hairstyling!

Apparently “Room Tours” are all the rage for young teens on YouTube these days, giving other teens ideas on how to decorate their rooms. I think BrooklyAndBailey has a record for the oldest room tour on YouTube with their latest video, their reactions to their first bedroom when they were 3 1/2 years old! They will have you laughing for sure, simply click below to watch…