Ever since Brooklyn and I were little girls, we were fascinated with Dorothy from The Wizard of Oz, starring Judy Garland!
I think part of it had to do with our dad telling us all the time that one of the last remaining munchkin actors lived out the rest of his life in my dad’s small hometown of Shelley, ID.
I remember our mom bringing home a pair of sparkly red-glittered shoes {made to look like Dorothy’s ruby slippers} from a garage sale, and I was in heaven! I wore them all the time, even if I was wearing pajamas! When I grew out of them, Kamri then wore them and I begged my mom to buy me new ones.
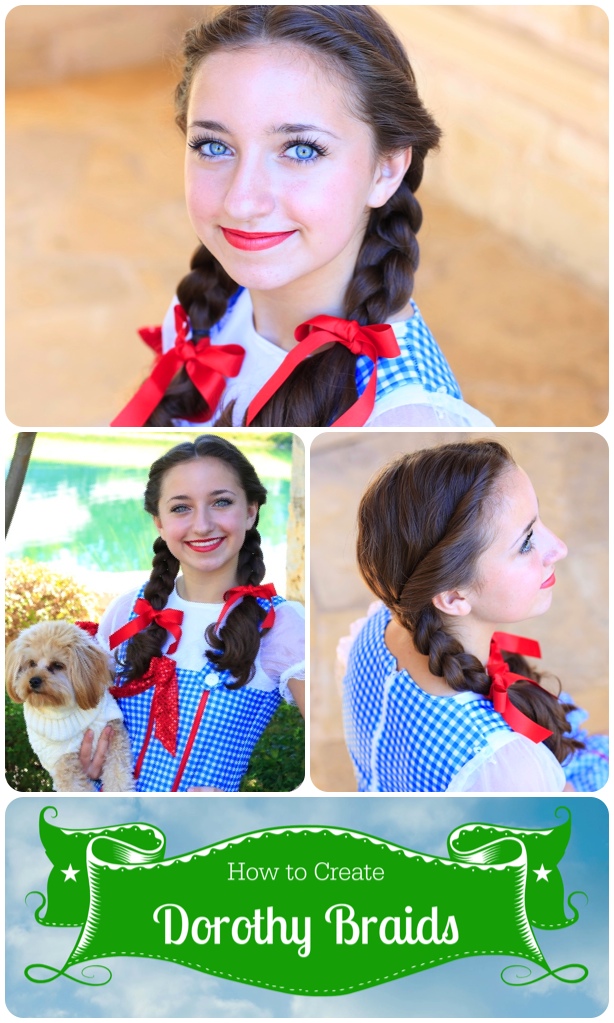
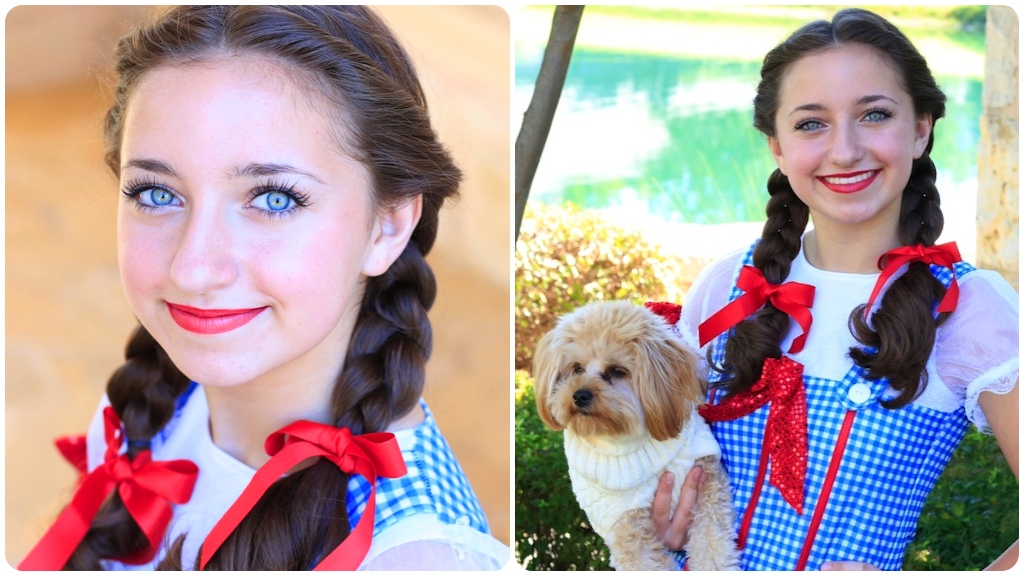
When my mom proposed doing this Dorothy Braids tutorial on herself the other day, I begged and begged her to be the one to do the tutorial! She agreed! We quickly found a Dorothy costume in my size at a local Halloween store, grabbed my red Converse sneakers {yes, a modern touch} from our closet, and went right to work!
So, today we will be showing you how to create Dorothy’s braids from The Wizard of Oz! I even have my own Toto the dog, in Braidy! Isn’t he cute in his adorable sweater?


To see your own photo recreations featured in our CGH App, feel free to tag your own photos of this hairstyle on IG with: #CGHDorothyBraids
This hairstyle is perfect for Halloween, school or local productions of The Wizard of Oz, or for everyday wear {minus the costume, of course}! Dorothy actually wears blue ribbons in the movie, but for purposes of the costume we bought, red ribbons looked much better.


I experimented a little with my makeup to complete the Dorothy look. I wanted to accent my lips and to brighten my eyes, so I opted for ruby red lipstick and highlighted the inner corners of my eyes with a white eyeshadow.
I loved this tutorial, and hope to be more involved in future tutorials! Don’t forget that this month of October our mom will be putting up more of our #CGHSpooktorial series Halloween Hairstyles, including a collab tutorial of a Monster High character look next week!
Items Needed: Brush, rat-tail comb, spray bottle, 2 small hair elastics, 2 hair ribbons, hairspray {if desired}.
Time Requirement: 3-5 minutes
Skill Level: Easy
Step-by-Step Instructions:
Begin by curling the hair with a wand, or a no-heat curling method {I find that 2nd day curls worked best as the base for this hairstyle}… Divide the hair down the middle of the head, and secure one half of the hair out of the way for now with an elastic… On your first side, pick up a small section of hair near the middle part line and begin to twist it upward toward the part line… As you twist the hair back, following your hairline and adding in hair after every twist, make sure all of the hair on that side is eventually incorporated into the twist at the back corner of the head. Also as you twist back, you will want to ensure that the twist remains fairly tight against the head {you can loosen it later}.. While holding the twist tightly in one hand, with your other hand begin to section the rest of that hair into three even strands {Optional: If holding the twist and creating braiding sections is difficult for you, at this point you can secure the twist with an elastic and then cut it out after you finish the braid}… With these three strands, now create a simple braid several stitches until you reach the collarbone area. Secure the braid with an elastic at that spot {which gives Dorothy’s signature fluffy and curly ends to her braids}… Repeat these steps to create a second braid on the other side… Add hairspray and bows {as desired}.Please feel free to leave a comment below letting us know what you think of these Dorothy Braids!
Happy Halloween!
It was Daxton’s turn to be interviewed on our BrooklynAndBailey YouTube channel! This video was part of a Meet My Brother tag going around YouTube lately, and Dax pretty much gave Brooklyn a run for her money! It is sooooo funny! By the end, he was clearly running the show! {PS~ Daxton is watching you!}