Every girl wants perfect nails. Unfortunately, a lot of girls are doing the “care and upkeep” part a bit wrong, which can hurt your nails in the long run and make them brittle and weak, which we definitely don’t want.
Fortunately, Sally Hansen has incredible nail tools to make your nails look healthy, shiny, and smooth. Also, they’re easy to find – all of the products mentioned are available at Target!
In this tutorial, I’ll be showing you the right things to do to keep your nails in tip-top shape. Being quick and hasty with your nails will not do you any good, so take about 8-10 minutes from beginning to end to prep your nails. Read on to see my steps to get the “ideal” college-girl nails!
Table of Contents
What you need:Step 1Step 2Step 3Step 4What you need:
 Sally Hansen No More Ridges Nail Buffer
Sally Hansen Clean Cut Classic Nail Clipper
Sally Hansen Patterned Nail File (I love this floral one!)
Sally Hansen Hard As Nails Extreme Wear Nail Color in Pep-Plum
Sally Hansen No More Ridges Nail Buffer
Sally Hansen Clean Cut Classic Nail Clipper
Sally Hansen Patterned Nail File (I love this floral one!)
Sally Hansen Hard As Nails Extreme Wear Nail Color in Pep-Plum
Step 1
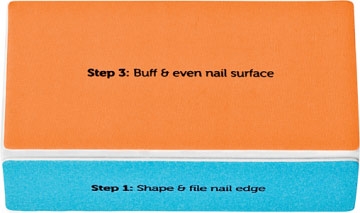
After using nail polish remover to get off any bits of polish, take your nail buffer (#1, above) and buff your nails using the four sides, which are conveniently labeled step-by-step! I know a lot of girls like to use the buffer last, however, I’ve found that buffing your nails beforehand makes it easier to clip and file them.
Make sure to carefully buff your nails slowly and gently so you don’t break one of your ridges (if you have any). Buffing fast can take too much nail off making your nails unnecessarily thin and weak, so we don’t want to do that!
One last tip: Make sure to pay extra attention to the Step 4 side, which shinesyour nails. It will perfectly prep them for polish! Do this again at the end of the tutorial to make sure your shine is still intact.
Step 2
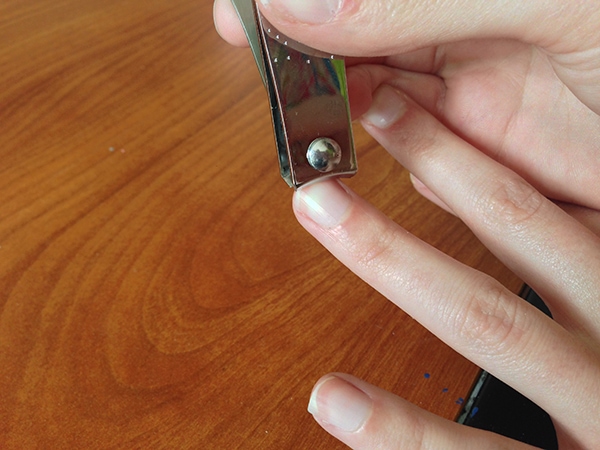
Next, clip your nails using the Sally Hansen Clean Cut Classic nail clipper! This nail clipper is the best one I’ve ever used. It fits perfectly in my hand and gives such a sharp cut, you don’t have to use too much effort.
You see the sharp edge on my pinky nail above? We want to get that off and make sure it’s gone, because that’s not a good look. Clip your nails in 3 parts: left, right, middle. You don’t want to clip your entire tip off at once. That could lead to breakage (and it’s tough to do). Bending your nails too much while clipping could damage them. Just be gentle,and don’t force it!
Step 3
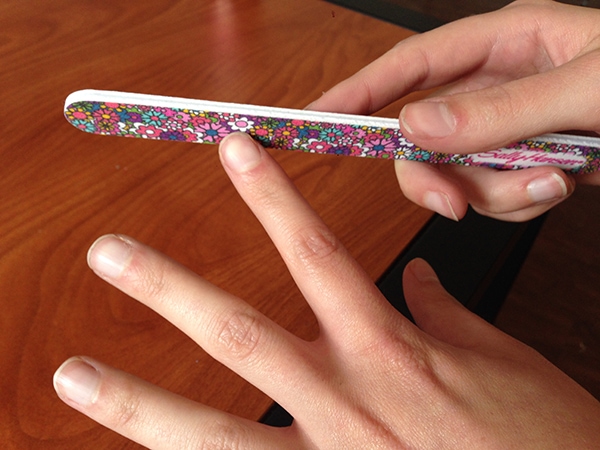
File away! I love the design on this nail file by Sally Hansen, and the file itself is coarse enough to do its job but no so course that it rips your nails. It’s basically perfect.
I know a lot of your moms, grandmothers, or friends have probably told you this, but it’s true: Don’t file your nails left to right. Only file them in one direction! Filing in both directions can weaken your nails.
File your nails until you feel no rough edges. You can check for rough edges by running a piece of soft fabric like a sweater or fine-knit t-shirt over the edges of your nails and seeing if they catch on the fabric. If they catch at any spot, you can just re-file and fix it up!
Note: After this step would be a good time to clip your cuticles if you like to do that. (Not everyone does this; it’s down to personal preference.) If you do cut them, I recommend the Sally Hansen Nip-Em-On-The-Go cuticle trimmer!
Step 4
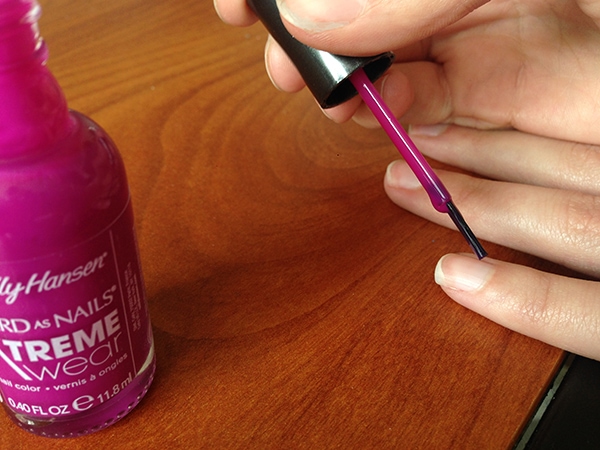
After your nails have been shaped and perfected to your liking, apply your favorite shade of nail polish. I’m currently loving this one from Sally Hansen’s Hard as Nails Extreme Wear line called Pep-Plum. The name is adorable, and this color is so on-trend for spring and summer!
These polishes are also famous for how long they last without chipping, and they definitely do, no joke.
I like to apply polish in three strokes, really slowly, and starting from directly above the cuticle. Theres no need to paint your cuticles! I paint one stripe on the left, then right, then middle, hopefully covering all of my nail at this point. Do two coats.Finish with a top coat, and you’re done!
Disclosure: This post was sponsored by Sally Hansen and the Sally Hansen products were provided for free. The opinions, as always, are our own. For more information, please see our Disclosure page.